How to Remerge Mkv Openings and Ending Inot One File Again
Despite how effective and pop VLC media player is, it can encounter errors that disrupt video playback. If you lot use VLC media player very ofttimes, then chances are you've come across such problems too, fifty-fifty if you lot don't know what acquired them. Attempts will be made to give you as much information as possible about these errors and how yous can fix them.
Part 1: Overview of Playing MKV Videos on VLC
VLC is a powerful open-source media player that effortlessly plays MKV files. To make the near of this robust media actor, set up it as your default actor for playing MKV files. There are 2 quick ways to get about doing this:
- Locate the MKV file yous wish to open up and right-click on it.
- Get to properties from the driblet-down card and click on Change.
- The set VLC media thespian every bit the default awarding for opening MKV files. A different way to open your MKV files using VLC is to;
- Launch VLC media player
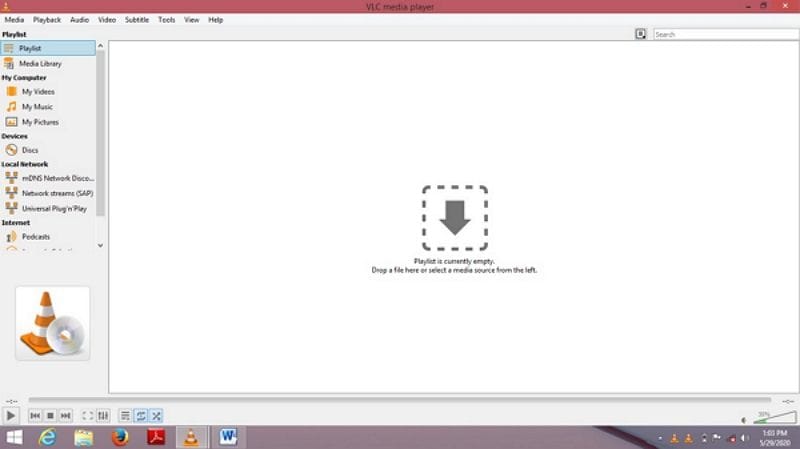
- Go to Media>Open File and go to the location of the MKV file
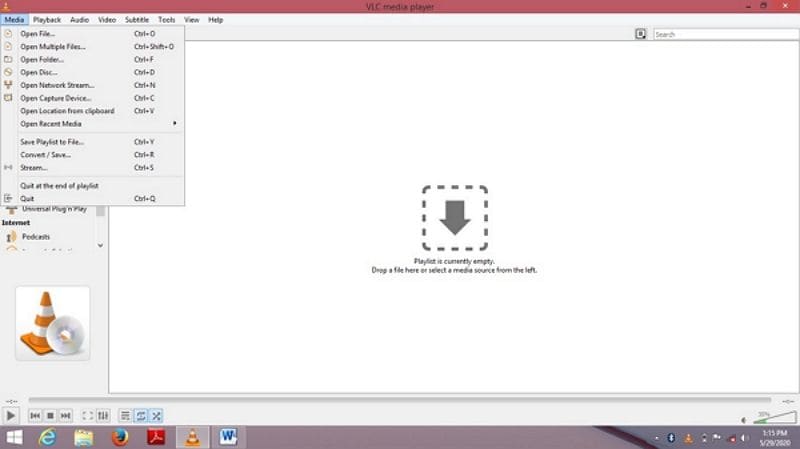
- Select the file you wish to play and click on Open.
Part 2: Different MKV Playback Problems on VLC Actor
VLC media player's popularity and efficiency nonetheless, it'southward still plagued by some errors. Some of the most common errors users have experienced are:
- Failure to open MKV file
- An error pop-up dialog box
- A dark-green screen shows while playing MKV files.
- Freezing.
- Stuttering.
- Skipping.
There are also times when the screen goes pitch black equally y'all play the MKV video file using VLC media player. All you tin can hear is the audio of the video simply zip is displayed on the screen. In other cases, the problem is reversed and it'due south the pictures of the MKV files that display but without the sound. The cause could exist damage made to the MKV file during the download procedure.
And if you lot are operating a relatively older version of the VLC media histrion, information technology may or may not support the new MKV file format, so n update is necessary hither.
Another potent factor in how well your MKV videos play or don't play is whether your display adapter is updated or non. Your brandish driver provides graphics and display capabilities so it's indispensable if y'all want your MKV video files to play properly.
Also, damage to the MKV files caused by improperly shutting your system or sudden ability outage or using an inefficient media player tin can all fail MKV files.
When some codecs are missing from your VLC media player, the role player's streaming capabilities might be compromised and fail to piece of work equally it should.
Part 3: Different Methods of Fixing Not Playing MKV Files
As mentioned earlier, there are different reasons as to why an MKV video does play on the VLC media player, and the reasons may vary. The practiced news is depending on the type of error you are experiencing, there are dissimilar ways to become almost fixing those MKV files that are not playing.
Solution 1: How to fix VLC skipping MKV or Hard disk drive MKV files
Follow these simple steps to gear up MKV files skipping when played in VLC media role player:
- Launch VLC media player
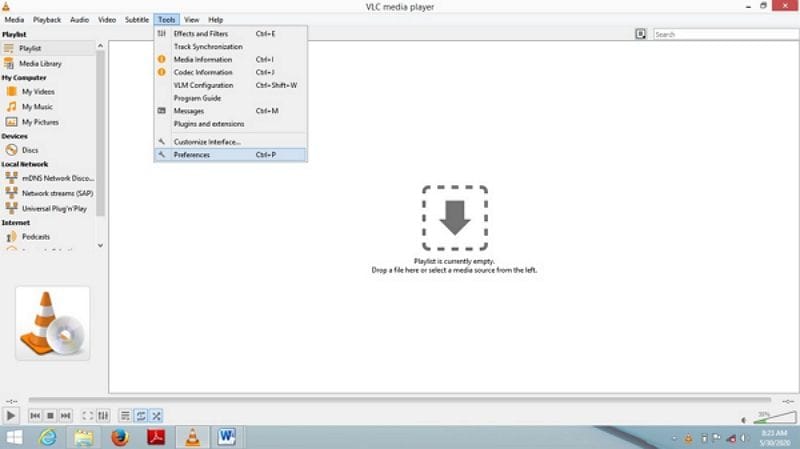
- From the menu bar, click on Tools and Select Preference from the drib-down menu.
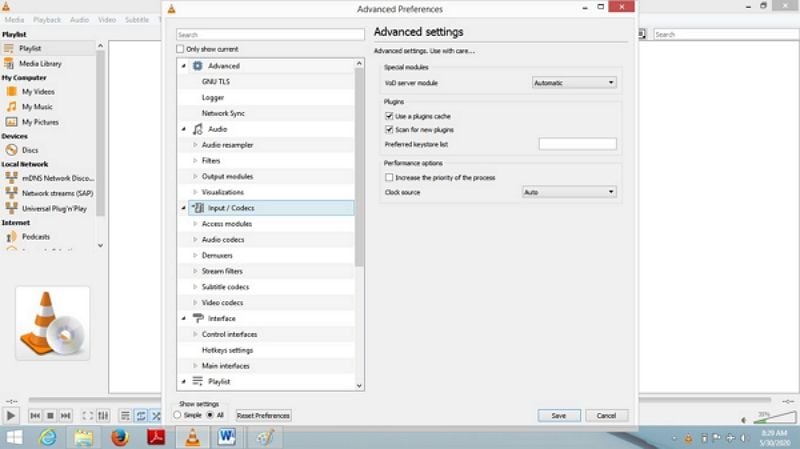
- Click on the All radio button on the lesser left side of the reference dialog.
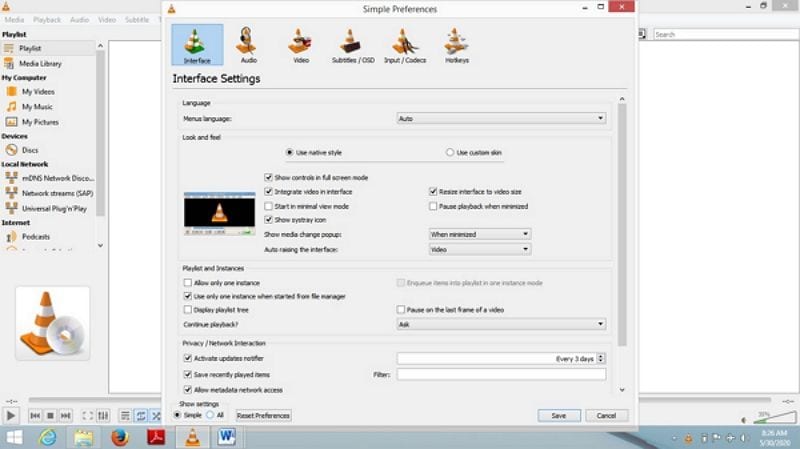
- Select the Input/Codecs from the menu you see.
- Scroll down the list you lot run across and go to File Caching (ms) in the advanced department, then set it to yard.
Solution ii: Fixing a Damaged or Corrupted Original MKV File
Wondershare Video Repair is a renowned software with a defended feature for repairing corrupted files with ease. It can be used to repair and recover damaged files from external and internal drives and fifty-fifty deject storage units. Whatsoever video damaged by virus attacks, improper shutdown, or some other reason tin can be repaired using this powerful tool.
The software provides 2 different video repairing modes: The Quick and Advanced modes. Follow these steps to repair your damaged or corrupted video files.
Quick repair
Stride one: Launch Wondershare
The outset thing to practise is to launch the application and add the corrupted video to the home screen. You tin can practise this in two means, and both of them are simple.
- You lot can either drag and drop the video file onto the software'due south first interface.
- You tin click on the Add push located to the bottom left and then select the video from wherever information technology is located on your drive.
And retrieve that y'all can add videos in multiple different file formats, so you're non just restricted to MKV video formats. The software can also prepare damaged videos in these formats: including MOV, M4V, MP4, MKV, M2TS, 3GP, FLV, and AVI.

Footstep 2: Repair the Corrupted Video or Videos
One time you're sure you've added or uploaded the right video, just click on Repair. The size of the file does not affair every bit Wondershare Video Repair does non accept size restrictions. To reiterate, yous can add more than ane video file for the repair.
The repair procedure shouldn't have as well long and once information technology'due south done, a new window will pop upwards, notifying you of the completion of the process and asking you to preview the repaired video-you lot can just skip that and save it. Click the Ok button to save the video.

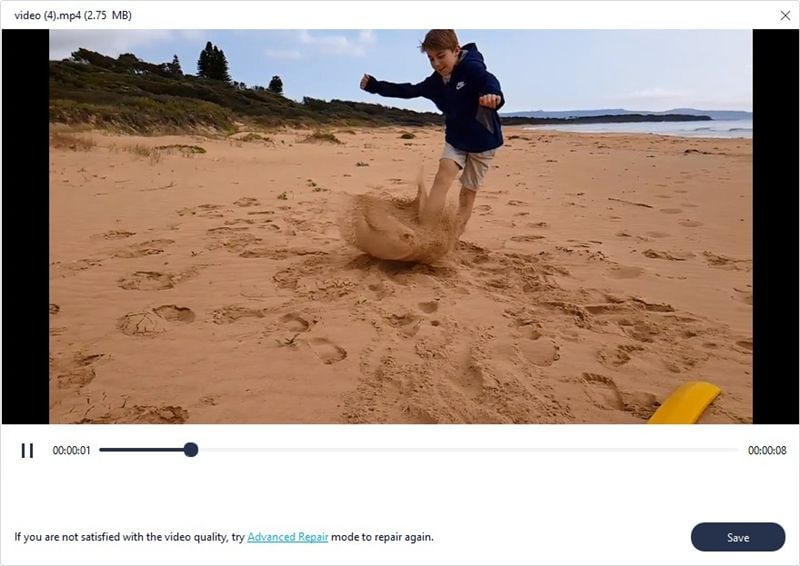
Step iii: Preview the Repaired Video
Look to the bottom left of the window you're on. Do you run into that lilliputian triangle that looks like a Play button? Click it to preview the video before you salvage information technology.
The elementary reason you lot'll want to do this is to see whether the video was repaired properly so you tin proceed to save it.
Step 4: Add sample video via Advanced Mode
What you just learned was the Quick Repair but, if for some reason, the repaired video does not come up out the manner you want it to, you tin try the Advanced Repair mode for a meliorate outcome. This option is for severely damaged videos. Do you see that Preview failed? Try the Advanced Repair button? Click it.
In the next window, you'll meet a folder icon. Click it to locate the sample video on your reckoner and add together it to the software.
The sample video to be added has to the aforementioned format equally the corrupted video and it must take been created by the same device. What's the reason for this? It'southward because the data from the sample video will be utilized to fix the damaged video. In this instance, both the sample and the corrupted video have to exist MKV file format too.
Next, click Repair. You'll be asked if you wish to save the video you'll repair earlier y'all motion to the Advanced Repair. The reason you lot'll be prompted with this option is that by default, Advanced Repair does not automatically salve whatever repaired video. So, choose by either clicking Yes or No.

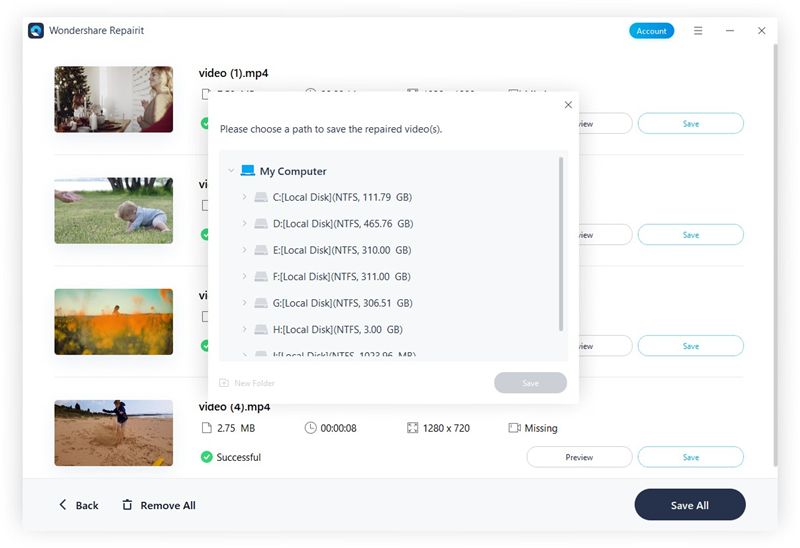
Pace 5: Save the Repaired Video
Once you click on Save, select a directory where the repaired file will exist saved. But don't select the same location as the original file or the damaged video, or else you lot chance corrupting the video once again.
If yous're unsure where to choose, just select a drive on your estimator that has a lot of space. Once yous click Recover, the video will exist saved in the location you specified. Another option you have is to click New Folder and so Recover. Do this and the video will be saved in the new folder you just created. You lot can rename the folder if you so wish. The renaming makes it easier to locate the binder too, so that's recommended.
Well, that'southward all there is to it. Follow these steps and you'll have your videos stock-still and playing smoothly in no time again. Wondershare Video Repair is a very powerful tool, but it makes everything await then easy, doesn't it?
Solution 3: VLC Media Player Sound Preferences Reset
When you attempt playing your MKV videos using VLC Media role player but no audio comes out, endeavour resetting the VLC media player's audio preferences.
- Launch VLC Media Actor
- Click on Tools and then Preferences
- Next, click on Audio and then Reset preferences
Solution iv: Installing MKV Codec for VLC Media Actor
Missing MKV codecs on your VLC Media Player can result in videos that don't play as they should. You can download the MKV codec and install it on your device to avert future mishaps.
If you're unsure what a codec is, it'southward a format that supports a remarkable number of video and audio files so they can be played on your VLC media actor and your system'south other media players. If you run across Codec Pack instead of MKV Codec, it'south still the same affair, and so go alee and download it.
Solution five: Fixing Streaming part
In a state of affairs where the streaming function on your media player is not enabled, you lot tin rectify this by enabling Open GL in the preferences
Pace 1: Launch VLC Media Player
Stride ii: Go to Tool>Preferences and click on Video
Step 3: From the Video drop-down menu, select OpenGL Video Output
Stride 4: Save the inverse settings
Step 5: Activate changes by restarting VLC.
Solution vi: Updating Brandish Adapter Driver
Your organisation tin't hope to function properly without drivers, the simple reason is that a driver is a program that enables your reckoner to utilize other hardware components and other parts of that computer. Thus, as an in-built Microsoft software, the brandish adapter driver provides graphic brandish capabilities. So, always keeping an upwardly-to-engagement commuter is paramount. Y'all tin can download the software online in several ways. Fifty-fifty better, but update your Windows, thereby updating the Brandish Adapter Drive in the process.
Solution 7: Updating VLC Media Player
At times, operating an outdated version of VLC media might the reason why the MKV files are not playing. Update the Media Player to its latest version and bask all information technology has to offer.
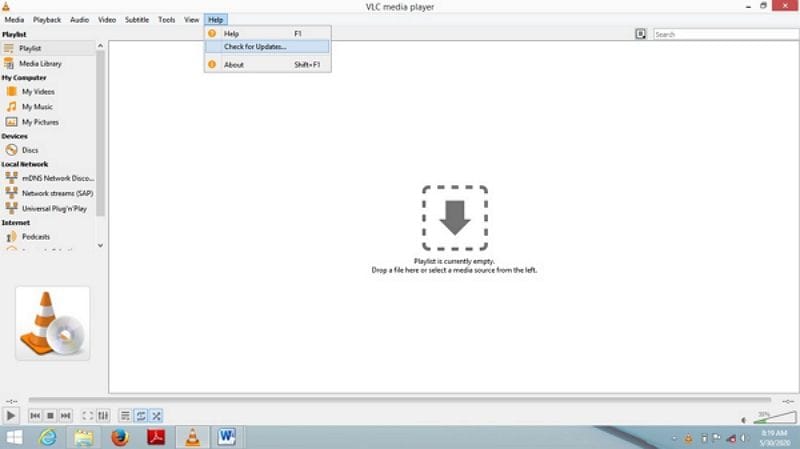
- Launch VLC Media Player.
- Become to Assist and click on Check for Updates.
- Select the Recheck Versions push to update the VLC media player.
Part 4: How to Prevent MKC VLC Problems
Although some users have reported certain issues with VLC media player, it'southward still considered one of the best media players in the earth. It is uniform with unlike platforms and is relatively piece of cake to use to the states. Here are some workable tips and suggestions on Playing MKV files smoothly in VLC.
- You can catechumen the MKV files to other VLC supported formats such as MOV/MP4, DivX, MPEG-4, and WMV to avoid the fault screen, faulty sound, or any other event.
- Modify the power settings on your figurer. There are times when using Battery Saver or Ability Saver fashion can be the reason behind why your VLC media player is lagging. Set up your power choice to High performance when playing HD videos equally they require a lot of power to run smoothly. Persistent lagging can make a figurer malfunction.
- Endeavour playing MKV files with other supported media actor alternatives. Players such equally 5kPlayer are considered second-best. Withal, some features of the 5kPlayer, like the 180+ audio codec and the 450+ video codec, brand the culling player a superior and better option at video playback. The 5kPlayer can play 4k MKV videos on dissimilar operating systems, has no DVD issues, is like shooting fish in a barrel to download, and supports MKV (H.265) seamlessly.
- When installing drivers, make sure you download and install the consummate driver packet. Equally a result, VLC can properly view MKV videos without any lagging or stuttering. Too, downloading the ATI Avivo tool tin can ready VLC's MKV lagging problems.
- Disabling Hardware decoding in VLC can fix the lagging issue too. Although it is quite a useful feature, it occasionally interferes with some drivers. In other scenarios, you'll be required to turn on the hardware decoding feature to solve the lagging upshot in the VLC Media player. Follow these steps to do that:
Step 1: Launch VLC media player and go to Tools>Preferences.
Footstep 2: Select Input/Codecs
Pace 3: Alter the choice to Disable.
Step 4: Save the new settings.
- Increasing VLC enshroud values even equally you play a video offline can aid with the constant lagging. Y'all tin can exercise that past changing the file caching value to a college 1 similar, say, 1000 or 2000.
Footstep one: Go to Tools in the carte du jour bar and then Preferences.
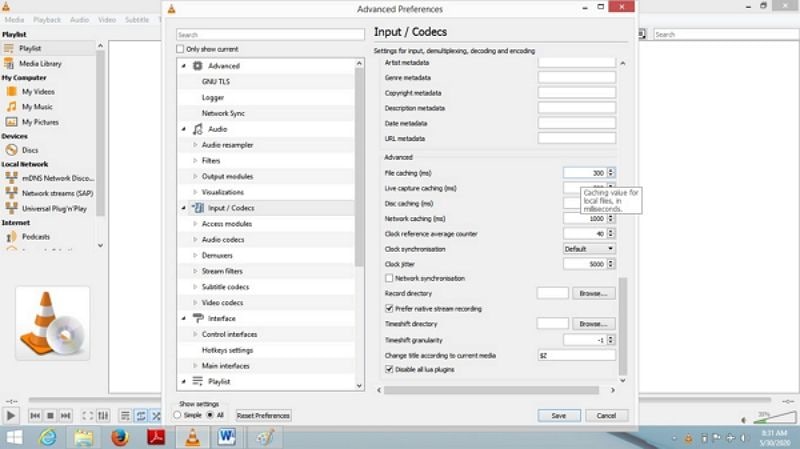
Pace ii: Select All at the lesser right side of the screen and then click on Input/Codecs.
Step 3: Coil downwardly to the Avant-garde section and change the File caching value which is I milliseconds to 1000 or 2000.
Furthermore, changing the values for Network caching (ms) and Disc caching (ms) can improve VLC playback operation. Network caching comes into play when you play a video stored on a network on your current system.
Closing Words
It is not uncommon to experience difficulties whilst playing MKV videos on a VLC media histrion. A fair share of users has reported an issue or two they had. The article showed you the reasons behind those problems and how you can go near fixing and repairing damaged/corrupted MKV video files. Wondershare video repair is an amazing and powerful tool that yous can use to repair MKV video formats among others.
Other pop Articles From Wondershare
dickinsonrusuremb.blogspot.com
Source: https://repairit.wondershare.com/video-repair/vlc-mkv-problem.html
0 Response to "How to Remerge Mkv Openings and Ending Inot One File Again"
Post a Comment